


Your Cart is Empty
Brood inspections are an incredibly important part of looking after your bees – if not the most important part! Read on for how to conduct a brood inspection – with information for newbees, or more experienced beekeepers wanting a refresher or different point of view.

In addition to our post below, we have a livestream of Cedar performing a brood inspection with questions and answers from the audience.
In spring/summer, it is a good idea to inspect your hive more often – about every 2-3 weeks. We recommend to check in with your local beekeeping club, as the frequency will depend on the local climate and needs of your bees.
As you come to build more of an awareness of your colony, you will be able to also sense whether everything is going okay, whether the hive is bursting at the seams and in need of more room, whether they seem to be a bit weaker, or numbers are declining etc. They will signal when it comes time to do a hive inspection.
Make sure to only conduct inspections on calm, warm days (i.e. not cold, not windy, and not raining) when the outside temperature is above 15°C (59°F).
The ideal time is in the middle of the day when the majority of forager bees are out, and the outside temperature is warmest.
Make sure to wear protective gear, and ensure it is thoroughly zipped up before cracking into your hive with your j-hive tool.
Bring something to take notes - an inspection log book, notebook, or smartphone — beekeeping apps are available. A torch (or flashlight) is useful to help see eggs in cells, and taking photos is great for later reference.
Get a smoker going and ensure there is enough fuel so it doesn’t go out at a crucial time. There is a bit of an art to this – we like to use scrap newspaper and some lightweight lighting material, such as dried leaves and grass, adding a little at a time, whilst puffing the bellows, until there is quite a flame visible. At this stage, add extra material, ensuring to pack it down quite a bit. Keep compressing the bellows of the smoker.
Be careful not to burn yourself.
We like to add slightly damp—or fresh—grass clippings on top to make the smoker a bit cooler.
Once lit, give a few puffs of cool smoke in the hive entrance a couple of minutes before opening to allow it to make its way through the hive, masking the pheromones and calming the bees.

Brood inspection with a Flow Super Lifter
Warning... a full super can be heavy! If you've got a Flow Super Lifter, it will make your brood inspections easier. If there is a super or second brood box on your hive, attach the Super Lifter to gently lift the upper box and keep it in place while you conduct your brood inspection.
Before you go into your hive for a brood inspection, it’s good to have an idea of what you want to be looking for, this will ensure you are working methodically and efficiently.
Food
Eggs
Disease
Space
Swarms.
This is what you should be looking for when you are conducting your brood inspection.
You want to make sure the bees have enough capped honey and pollen supplies for the time of year (and the expected nectar flow) – especially for overwinter.
The number of frames of honey that you should leave depends on your climate. Please consult local beekeepers for guidance on how much they leave for their colonies over the winter. Read more about overwintering here.

Multi-colour pollen stored in naturally drawn comb

Capped honey stored, and some uncapped nectar in the bottom center of the frame
3 day old larvae and eggs are also a sign of a recently active queen.
When the frame is held up to the light, freshly laid eggs are easily seen. A healthy queen will lay her eggs in the centre of the cell.
A view down a brood cell with eggs
Check for pattern of brood – should be full and healthy looking.
A frame of very healthy looking capped brood pattern
Identify whether worker brood and drone brood is present.
If an excess of drone brood is present (which the photo below does not depict), this could mean your queen is infertile or not present. Worker bees can also lay eggs, which are unfertilised and thus become drone brood in emergency situations when the queen has died.

Capped drone brood and worker brood
Drone bees are generally larger overall than worker bees. They have large eyes and a fat thorax, whereas the worker bees have smaller-proportioned eyes and body.

Uncapped brood, capped worker brood, worker and drone bees
You don’t need to find the queen, however if you do, it’s always a moment of real excitement! She has a long, pointed abdomen – perfect for laying eggs.
You can also assess the presence of your queen by the sight of eggs and approximately 3-day-old larvae.
Think your hive may be without a queen? Read more about diagnosing whether your hive is queenless here.

Queen bee in the centre of the frame
Pest and disease – check for presence. Have a look at our pest and disease resourcefor what these may look like when present.
For example, sunk cells or pin-prick in the capped brood can indicate AFB or EFB.
Be aware of any cross-combing as you move through the brood box, especially when using foundationless frames. Read more about foundationless frames and cross comb here.
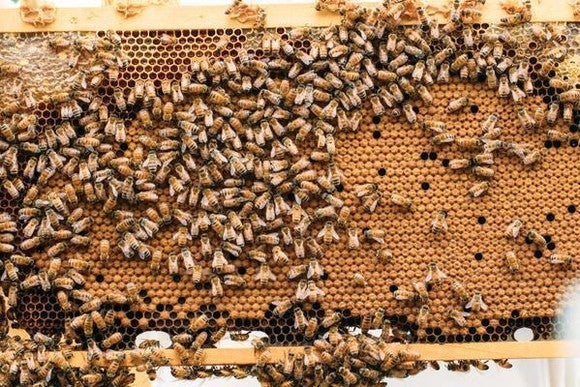
If end brood frames have brood, it means the colony may require more space, as typically they work from the centre outwards. Edge frames should have honey in them, as it is part of their thermal-mass stabilisation.
Depending on your local conditions, this may be the time to add either the Flow Super or a second brood box.
Check whether the hive is overcrowded, if there are drones and also queen cells, this could indicate your hive might be getting ready to swarm. Queen cells are peanut-shaped protruding cells, usually at the edges of brood frames.

Queen cells and cups on a brood frames
For step-by-step instructions for inspecting your hive, including a downloadable info sheet and inspection notes, try TheBeekeeper.org. It’s got everything you need to become a great beekeeper, and comes with a 30-day free trial.
When replacing the frames, put them back in the same order you removed them to maintain the layout/structure that the bees have built.
Gently replace the super and queen excluder if the hive is supered. Finally, replace the inner cover/crown board and the roof.


