Your Cart is Empty
🐝 Start this spring and save $130. Shop now 🌿
🐝 Start this spring and save $130. Shop now 🌿
Should I requeen my hive?
by Hilary Kearney 4 min read
Every beekeeper needs to replace the queen in their hive at some point. This process is called ‘requeening’. There are many different reasons to requeen a hive and even more ways to do it! Hilary Kearney tells us how...
How often should I requeen?
Some new beekeepers may be confused about when and why to requeen a hive. Commercial beekeepers with large operations often requeen their hives on a schedule. This practice is based on the theory that older queens will not lay as well as a young queen. Some requeen every year and others requeen every two years, but if you are a hobbyist, I don’t see any reason to requeen on a schedule. I often tell my students, “If it ain’t broke, don’t fix it!” Beekeepers with large operations have hundreds or sometimes thousands of beehives. Unlike hobbyists, they simply do not have time to individually evaluate them all and decide if they need to be requeened. So, if your hive is thriving with a three-year-old queen, there really is no reason to replace her.
Why requeen?
Reasons for replacing the queen include: colony health, under-performance, temperament or apiary expansion. You can read more about identifying whether your colony needs requeening here.
- Requeening solves many brood disease issues in the hive because it creates a brood break. The period of time between queens will mean a gap in the brood cycle and without brood, many brood diseases cannot persist. Also, the new queen will usually be genetically stronger.
- Sometimes a queen simply doesn’t perform well. She may have an uneven laying pattern, produce too many drones or just not lay enough.
- If a colony becomes too defensive, replacing the queen will solve the issue. Once the new queen is installed it may take a month for the bees to completely calm down because it won’t be until then that all the bees from the old queen have died out, but I often see at least a slight change soon after the new queen begins to lay.
- If you want to increase the number of hives in your apiary, you can make a split. Basically, you divide a large colony in two and then ensure that each half has a queen. Beekeepers sometimes let the half without the queen raise their own, but you may want to install a queen with known genetics and this process looks a lot like requeening
In the image below shows a commercially purchased queen bee marked to make identification easier.

How to requeen
Step 1: Before installing your new queen, you need to remove the old one. In most cases “remove” actually means kill. This is nobody’s favorite beekeeping task, but it is sometimes necessary. To kill the queen quickly grab her off the comb by the wings and then pinch her head between your fingers. Some beekeepers like to do this several days before installing the new queen and others do it on the same trip.
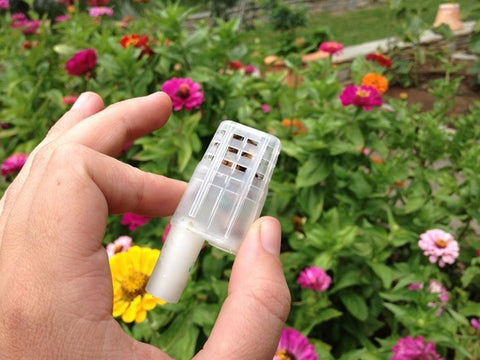
Step 2: Install the new queen. Your new queen will come inside a cage to protect her from the worker bees while they adjust to her smell. The queen breeder often gives specific instructions on how to install the queen. Since the breeder knows their bees best, I would suggest following their instructions. However, I generally position the queen cage on its side and affix it to comb with open brood with a rubber band.
The image below is an example of a queen arriving in a cage. Remove the cap before placing in the brood box and the queen will eat her through the candy blocking the exit.

Step 3: Follow up on your work. You do not want to disturb a colony too soon after installing a new queen or they may decide to reject her. I like to check one week after install to see if she has been released from her cage. Sometimes a queen can get stuck in the cage, after one week if this is the case, go ahead and release her. If she is out of the cage, try to find her, but you should also look for eggs. Once the new queen is laying you can consider your requeening a success. However, you need to be sure to check for supersedure cells. Worker bees will often try to overthrow their new queen and make a queen of their own genetics to replace her. If you do not find and destroy all the queen cells, the worker bees will kill the queen you installed once they have raised their own. For this reason, it is also important that you do not wait too long after installing the queen to check the hive. If you wait longer than it takes to raise a new queen, it will be too late.
Hilary Kearney is a full-time beekeeper in her home town of San Diego, California. Her business Girl Next Door Honey educates hundreds of new beekeepers each year. She is the author of the Beekeeping Like A Girl blog and maintains popular Instagram, Facebookand Twitter accounts. When she’s not rescuing bees, teaching about bees, photographing bees or managing one of her 60 colonies, she’s sleeping and dreaming of bees.


